Sunday, May 7, 2017

Know Details About A Registered Web Domain Address

You can find yours or any specific domain's basic details like: Domain creation date, expiry date, last update date, owner's name, phone, E-mail address, mailing address, name servers etc. in one authentic source. Go https://who.is, type your desired full domain name in a box like below,

Screenshot: Who.is Domain Search Box
For the site like "google.com", you are to type "google.com" in the box, and hit enter. The return page will give you publicly available information about the domain. The return page address would look like: https://who.is/whois/google.com

Simplifying the Return Address

You can directly enter to required information page even by following below way (this is unofficial)
Return Address: https://who.is/whois/google.com
Simplification: <whois web address> / <whois> / <required website address>

There are many pages who shares similar information. But to me ,that seems most authentic.

Please share your feedback to below comment box, like the Facebook page and tweet (all given side panel).

Upload Web Site Files Via FTP Without Any Software

There are several free software available for uploading your website's files via FTP (File Transfer Protocol) facility. Your website hosting server must have this feature available to enjoy this. FTP allows you uploading multiple files all at once, and you don't need to update one file each, separately.

Apart from using any software you can upload files in your website without any software; directly upload files to your website from your windows explorer just like copying files in your PC's folder.

Follow below steps.

Step 1: Go My Computer

Go to My Computer. Type: "ftp://<Your Full web Site Address>" in address bar. For example: ftp://google.com

Step 1: Go to My Computer

Step 2: Login

A below box will appear. Type your FTP Server Username and Password; then hit enter. Contact to the company from where you have bought the domain-hosting for FTP Login Name and Password, if you don't know.

Step 2: Login Window

Step 3: Upload Files

Once logged on, a familiar Windows Explorer like window will appear. Hope the next you can manage by yourself. Usually your web files are available to the folder named: "public_html". For uploading any file, just copy your files, and paste to desired folder/location. You can easily create folder within the area, by right clicking of the mouse. Close the explorer once you are done.

Step 3: Get to Within Your Web Files' Area
Please share your feedback to below comment box, like the Facebook page and tweet (all given side panel).

Simple Border Around A Picture in Photoshop using Stroke Option

In many ways you can draw border around a picture in Photoshop. Below screenshots are of Photoshop CS4.

Open the file in Photoshop which you want to border.
Select All by pressing "Ctrl + A"
Press Right Button putting mouse on the picture. Select "Stroke..."
Now change border size (Width), Color (Color) by changing option. In Location select "Inside".

Screenshot: Picture Border via Stroke in Photoshop

Now save and exit.

Please share your feedback to below comment box, like the Facebook page and tweet (all given side panel).

Adding Facebook Page Badge in Blogger Sidepane

You can add Facebook Page badge in Blogger via Facebook iFrame code if you don't get favorable gadget to add.


In Facebook Side

  1. Go > https://developers.facebook.com/docs/plugins/page-plugin. (You can also can reach the same location visiting number of pages. Go https://www.facebook.com/badges, click "Get Social Plugins", click "Page Plugin".)
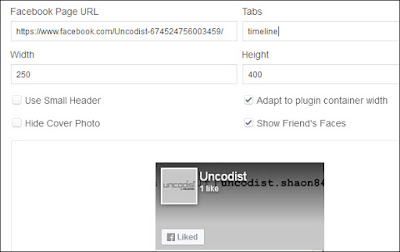
  2. Provide Page address, expected width (I have provided 250), height, check/uncheck required option as per requirement.
  3. Click "Get Code". Select "IFrame", and copy the code.
Picture: Facebook Page Plugin Area in Facebook

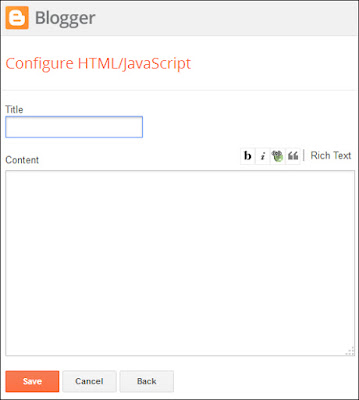
Picture: Java/HTML Code Box in Blogger

In Blogger Side

  1. Login to your blogger account, click "Layout".
  2. Click "+ Add a Gadget"
  3. Find and click "HTML/JavaScript".
  4. A new window will appear. provide a heading, example: "ABCD Facebook Page".
  5. Now, paste the IFrame code which has been copied from Facebook.
  6. Click Save, and see preview.
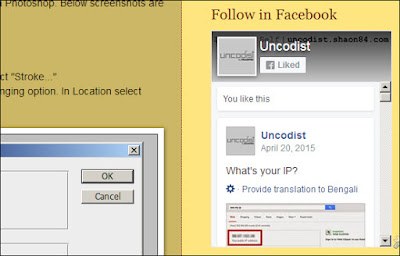
Picture: Sample outcome in right pane of your blogger page
Please share your feedback to below comment box, like the Facebook page and tweet (all given side panel).